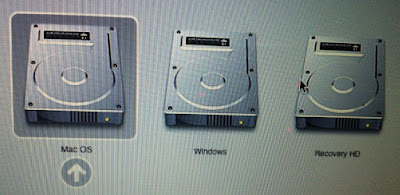
Mac OS X 10.7 Developer Preview can be installed and ran alongside Mac OS X 10.6 on the same drive, all you need to do is partition your existing boot disk and I’m going to show you exactly how to do this in a step-by-step guide (alternatively, you can run it in VMware too).
Why do this? Having two separate installations of Mac OS X has several advantages over installing Lion atop your existing 10.6 installation (the default method), here are the primary reasons I recommend dual booting instead:
Installing future 10.7 Lion releases will be easier
You are free to uninstall Lion at any time – without dual booting this requires a system restore from a 10.6 backup
You don’t have to use Lion as your primary operating system – remember it’s a developer preview and not intended for every day use
Now I’m going to assume you already have Mac OS X 10.7 Lion downloaded (grab Developer Preview from Apple) and ready to go, and that you’re currently running Mac OS X 10.6.
Important: Make sure you have a backup of your existing Mac OS X installation and disk before continuing with this guide. Time Machine makes this very easy. Any time you edit a drives partition table or install a new operating system there is always a small chance something could go wrong, so just be safe and have a backup ready.
Let’s get started!
1) Create a partition for Mac OS X Lion
You can create a new partition on your hard drive with Disk Utility, this does not require you to reformat the drive and you should not lose any data (besides, you have that backup just in case something goes wrong, right?).
Launch Disk Utility
Select your hard drive from the left hand side
Click on the “Partition” tab at the top
Click on the “+” icon to add a new partition, name it ‘Lion’, or chimichanga, or whatever you want
Set the partition size for Lion, I chose 20GB to make it easy
Click on ‘Apply’ to create the new partition, and you’ll see a message like this one:
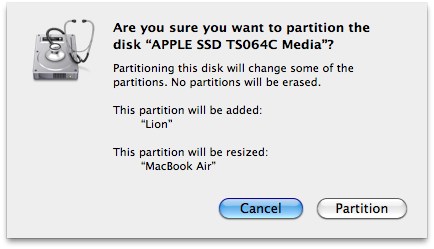
Click on “Partition” to create the partitions as indicated
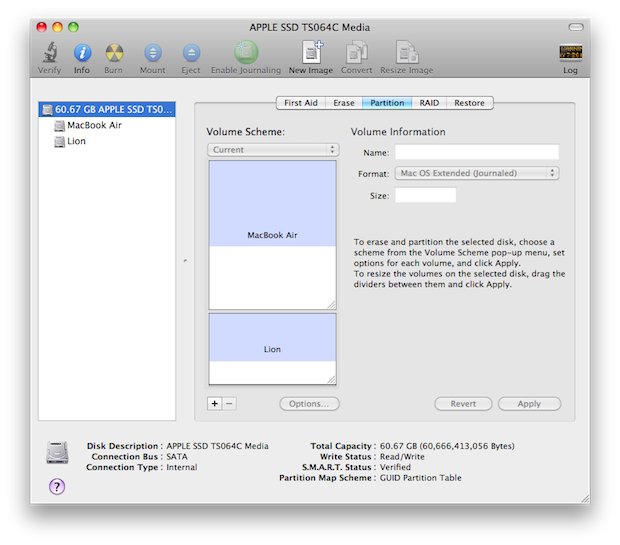
You’ll now see two partitions on your boot drive in Disk Utility, one that has your existing operating system (Mac OS X 10.6) and the newly created “Lion” partition, which is where you will install Mac OS X 10.7. It will look something like this:
How to Install & Dual Boot Mac OS X 10.7 Lion and 10.6 Snow Leopard
Mac OS X, Tips & Tricks - March 12th, 2011 - 79 Comments
dual-boot-mac-lion-snowleopard
Mac OS X 10.7 Developer Preview can be installed and ran alongside Mac OS X 10.6 on the same drive, all you need to do is partition your existing boot disk and I’m going to show you exactly how to do this in a step-by-step guide (alternatively, you can run it in VMware too).
Why do this? Having two separate installations of Mac OS X has several advantages over installing Lion atop your existing 10.6 installation (the default method), here are the primary reasons I recommend dual booting instead:
Installing future 10.7 Lion releases will be easier
You are free to uninstall Lion at any time – without dual booting this requires a system restore from a 10.6 backup
You don’t have to use Lion as your primary operating system – remember it’s a developer preview and not intended for every day use
Now I’m going to assume you already have Mac OS X 10.7 Lion downloaded (grab Developer Preview from Apple) and ready to go, and that you’re currently running Mac OS X 10.6.
Important: Make sure you have a backup of your existing Mac OS X installation and disk before continuing with this guide. Time Machine makes this very easy. Any time you edit a drives partition table or install a new operating system there is always a small chance something could go wrong, so just be safe and have a backup ready.
Let’s get started!
1) Create a partition for Mac OS X Lion
You can create a new partition on your hard drive with Disk Utility, this does not require you to reformat the drive and you should not lose any data (besides, you have that backup just in case something goes wrong, right?).
Launch Disk Utility
Select your hard drive from the left hand side
Click on the “Partition” tab at the top
Click on the “+” icon to add a new partition, name it ‘Lion’, or chimichanga, or whatever you want
Set the partition size for Lion, I chose 20GB to make it easy
Click on ‘Apply’ to create the new partition, and you’ll see a message like this one:
create-mac-lion-partition
Click on “Partition” to create the partitions as indicated
You’ll now see two partitions on your boot drive in Disk Utility, one that has your existing operating system (Mac OS X 10.6) and the newly created “Lion” partition, which is where you will install Mac OS X 10.7. It will look something like this:
mac-os-x-partitions-lion-snowleopard
Now that you have the partitions squared away, we’re on to step 2.
2) Install Mac OS X 10.7 Lion on the new partition
Now it’s time to install 10.7. The key here is to install Lion on the newly created partition and not the default which is atop 10.6. This is what will enable you to dual boot between 10.7 and 10.6:
Launch the Mac OS X 10.7 Installer and when it asks what drive to install on, choose the options to specify your own
At the “Install Mac OS X” screen, click to select the partition that you created in Step 1, I named it Lion as you can see in this screenshot:
How to Install & Dual Boot Mac OS X 10.7 Lion and 10.6 Snow Leopard
Mac OS X, Tips & Tricks - March 12th, 2011 - 79 Comments
Mac OS X 10.7 Developer Preview can be installed and ran alongside Mac OS X 10.6 on the same drive, all you need to do is partition your existing boot disk and I’m going to show you exactly how to do this in a step-by-step guide (alternatively, you can run it in VMware too).
Why do this? Having two separate installations of Mac OS X has several advantages over installing Lion atop your existing 10.6 installation (the default method), here are the primary reasons I recommend dual booting instead:
- Installing future 10.7 Lion releases will be easier
- You are free to uninstall Lion at any time – without dual booting this requires a system restore from a 10.6 backup
- You don’t have to use Lion as your primary operating system – remember it’s a developer preview and not intended for every day use
Now I’m going to assume you already have Mac OS X 10.7 Lion downloaded (grab Developer Preview from Apple) and ready to go, and that you’re currently running Mac OS X 10.6.
Important: Make sure you have a backup of your existing Mac OS X installation and disk before continuing with this guide. Time Machine makes this very easy. Any time you edit a drives partition table or install a new operating system there is always a small chance something could go wrong, so just be safe and have a backup ready.
Let’s get started!
1) Create a partition for Mac OS X Lion
You can create a new partition on your hard drive with Disk Utility, this does not require you to reformat the drive and you should not lose any data (besides, you have that backup just in case something goes wrong, right?).
- Launch Disk Utility
- Select your hard drive from the left hand side
- Click on the “Partition” tab at the top
- Click on the “+” icon to add a new partition, name it ‘Lion’, or chimichanga, or whatever you want
- Set the partition size for Lion, I chose 20GB to make it easy
- Click on ‘Apply’ to create the new partition, and you’ll see a message like this one:

- Click on “Partition” to create the partitions as indicated
You’ll now see two partitions on your boot drive in Disk Utility, one that has your existing operating system (Mac OS X 10.6) and the newly created “Lion” partition, which is where you will install Mac OS X 10.7. It will look something like this:

Now that you have the partitions squared away, we’re on to step 2.
2) Install Mac OS X 10.7 Lion on the new partition
Now it’s time to install 10.7. The key here is to install Lion on the newly created partition and not the default which is atop 10.6. This is what will enable you to dual boot between 10.7 and 10.6:
- Launch the Mac OS X 10.7 Installer and when it asks what drive to install on, choose the options to specify your own
- At the “Install Mac OS X” screen, click to select the partition that you created in Step 1, I named it Lion as you can see in this screenshot:
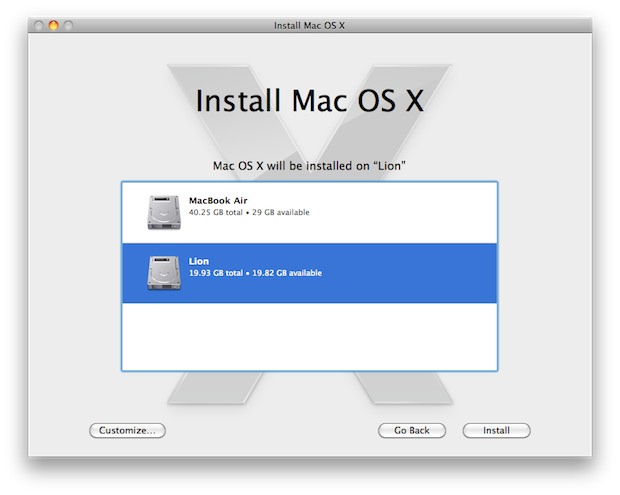
Optional step: Want to install Lion Server? Click on “Customize” and select the checkboxes for Lion Server
Click on “Install” and let the installer do it’s business
Once the installer is running, you’ll see a screen like this:
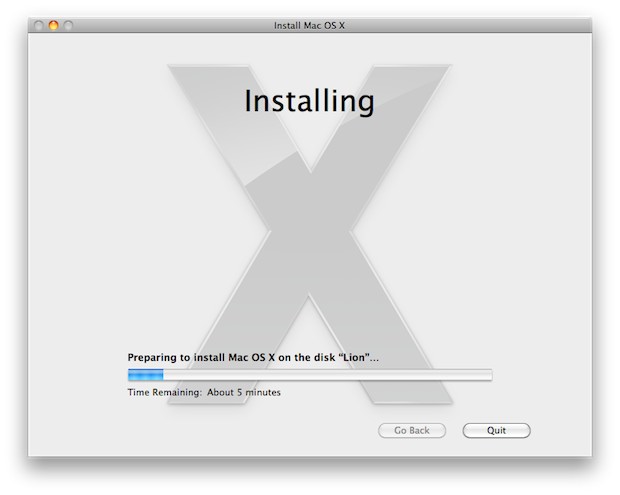
Just let this be as it runs. You’ll see a preparation window and then your Mac will reboot into the full installer. Due to the fact that you are installing from your local disk to another partition, the whole process is much faster than it would be to install from a DVD. On my MacBook Air 11″ the entire Lion installation took about 15 minutes.
When Lion is finished installing, your Mac will now automatically boot into 10.7.
3) Set your default boot drive: Mac OS X 10.7 Lion or 10.6 Snow Leopard
Now that Lion is installed, your default boot drive is set to 10.7. You can adjust this to be 10.6 too:
Launch System Preferences
Click on “Startup Disks”
Select your default boot drive and operating system
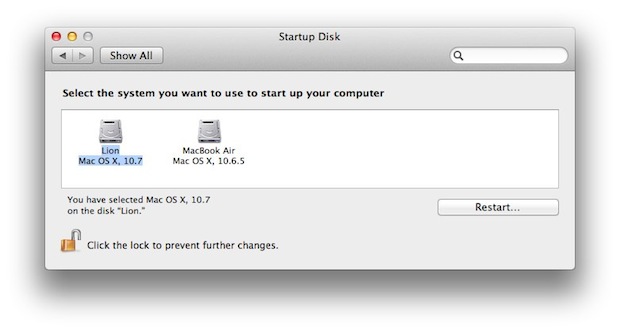
That’s really all there is to it.
4) Dual Booting: Select which Mac OS X volume to load on boot
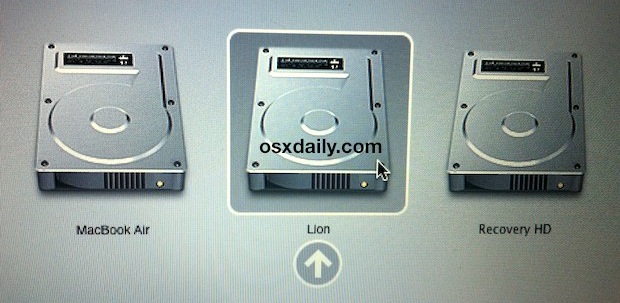
If you want to boot into a different Mac OS X installation than the one that is set as your default in the previous step, you can hold down the Option key during reboot. You will then see a boot loader like the image at the very top of this tutorial, where you can select which Mac OS X version and volume to boot from.
This is dual booting at it’s finest, and this is the best way to run the Lion Developer Preview. Remember, this is a developer preview for a reason, it’s not meant to be a stable operating system for daily use. Many have installed 10.7 Lion on top of their existing 10.6 Snow Leopard installation, and while this may be the easiest method it can’t be directly undone and instead requires a complete system restoration to uninstall and revert back to Snow Leopard. That’s a huge pain, just give Lion it’s own partition and make it easy on yourself.
Post a Comment