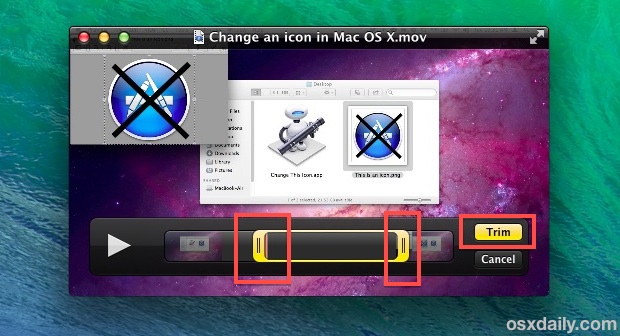
QuickTime is usually thought of as a movie viewing app, but it also has a few simple editing features that are extremely easy to use, and that don’t require the launching of a more complete video editing suite like iMovie. We’ll focus on the Trim function of QuickTime here, which lets you lets you shorten the total length of the movie clip by trimming it down to a shorter length. This is perfect for eliminating needless parts of a video, whether it’s a long intro, end credits, or some otherwise unnecessary piece of a video clip.
Trimming Video Clips with QuickTime
- Open a compatible video with QuickTime (use a video converter app to make it a .mov or .mkv if desired)
- Pull down the “Edit” menu and select “Trim”, or hit Command+T
- Drag the yellow bars left and right according to the section of the video you want the movie to be trimmed down to, then click “Trim”
- Save the video by pulling down the File menu and choosing “Export”
You may want to play the video or scrub through it to confirm the trim is adequate, if it requires any further adjustment just use the same Trim tool to further shorten the clip as needed.

Exporting the video is necessary because QuickTime can’t save directly, but it also insures that the trimmed clip is saved as a separate new video rather than overwriting the existing video.
The functionality is remarkably similar to trimming movies in iOS, both in functionality and in appearance, thus becoming familiar with one means you’ll be able to use the other with ease. Speaking of iOS, shortening video clips is also a simple way to reduce a movies overall file size before it’s transferred over to an iPhone, iPad, or iPod touch, or anything else with a smaller storage capacity, particularly if only a portion of the video needs to be viewed.
Aside from video, QuickTime can also be used to shorten mp3′s and other music files.
source
Post a Comment